Table of Contents
After a few years of saber rattling, veiled threats, and Universal Analytics Doom Clocks, the time has finally come for Google Analytics 4 to take center stage. At Go Fish Digital, we’ve been working with quite a few clients on migrating their properties to Google Analytics 4.
On July 1st, 2023, all non-360 Universal Analytics Properties will stop collecting data. 360 users get a whole extra year.
So for the vast majority of users, you will finally have to start using GA4 to dive into your website analytics. Maybe you’ve poked around in the dashboard or used it sparingly. Maybe you have half of it set up. Maybe you have nothing set up.
If you fall into any of those categories, use this guide to help you figure out your next steps.
Related Articles:
Step 0: Checking To See if a Google Analytics 4 Property Already Exists
In case you haven’t set up your GA4 property yet, you’ve probably been bombarded with Google emails warning you to do so. If you’ve ignored those, then it’s likely Google went ahead and created a GA4 property for you.
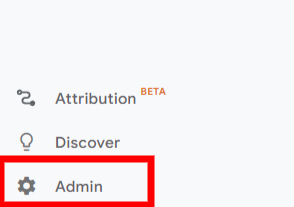
If you’re not sure, then you should go into your Universal Analytics Property and click on Admin.
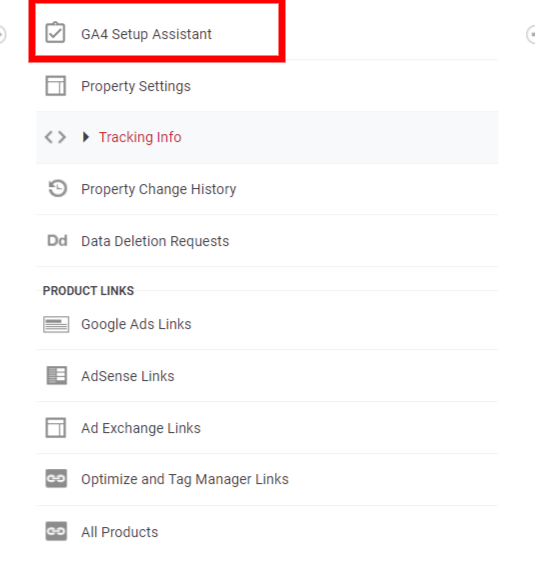
Then, click on GA4 Setup Assistant.
If you see a button that says “Go to Your GA4 Property” then you’re all good! If you see this, then you can skip to Step #2.
If you don’t see this option, go down to Step #1.
Step 1: Setting Up Your Google Analytics 4 Account
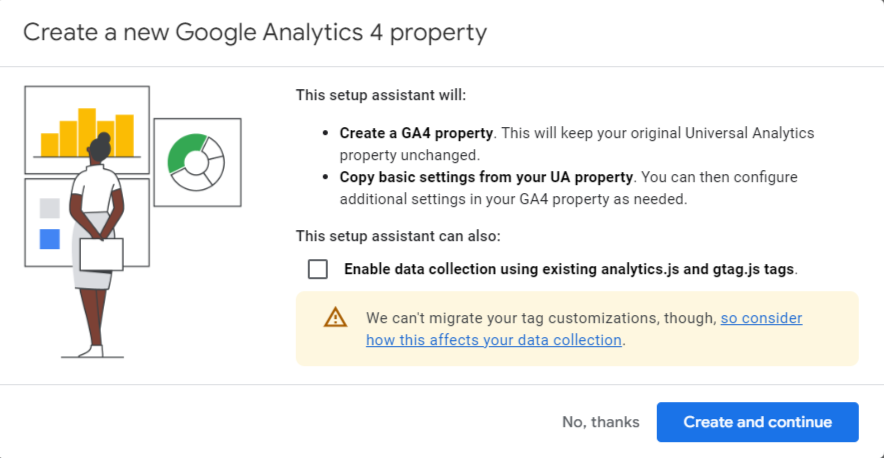
If you have to set up your GA4 account from scratch, you’ll want to follow the steps above to get to the below options.
Go ahead and click on the ‘Get Started Button’.
A window may pop up asking if you want to enable collection from an existing tag. Click yes. This will may your tracking setup much easier.
That’s it for the initial setup! Let’s go to the next steps.
GTM Setup
If you have a GA4 account set up or you don’t have an existing gtag, you can take your Measurement ID and place it in your Google Tag Manager container.
To do that, go to Admin, Data Streams, and then click on your Data Stream. You will see your Measurement ID next to your Data Stream name and copy the ID.
The Stream ID is completely different from your Measurement ID and won’t be able to track anything!
From here, go to Google Tag Manager. Once inside, click Add New Tag in the top left corner.
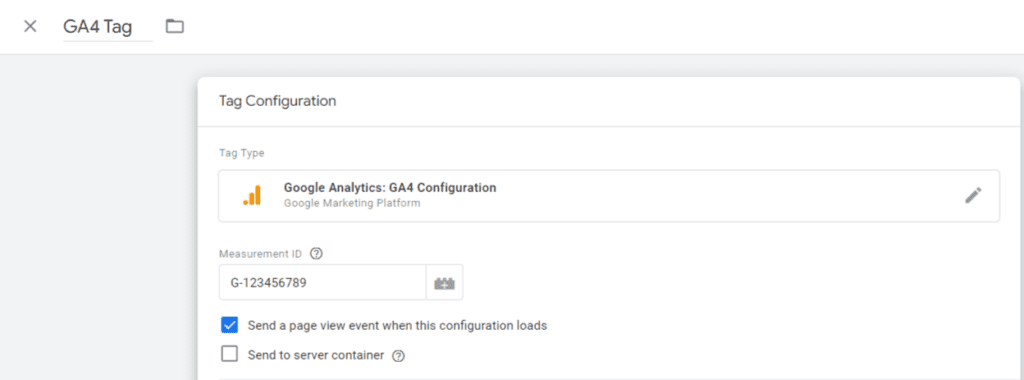
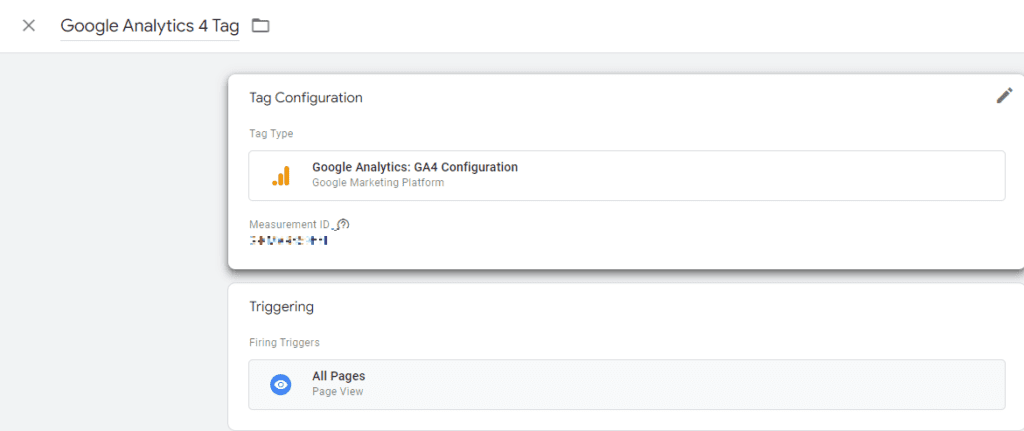
You can name your tag whatever you want, I chose to stick with something simple like GA4-Measurement ID.
Copy your Measurement ID and make sure the ‘Send a page view event when the configuration loads’ is checked (it is checked by default).
Once you create a tag, you need to go about adding a trigger. Click Edit Trigger and select All Pages. That way, your Measurement ID will fire on all pages. Here’s what the final product looks like.
Even if you don’t use GTM to track page views, you can keep the Measurement ID as a variable for any future events you want to create.
Step 2: Audit Your UA Property
Events and Conversions
You’re moving into a new analytics house and while it won’t be the same, you want to make sure everything is as close as possible.
First, you’re going to want to collect your list of events and conversions. We have used this Event Migration Spreadsheet to help keep us organized when moving items over.
No longer are you bound by the 20-event limit present in Universal Analytics. Everything in Google Analytics 4 is an event which means you can bring as many of your events over as you want.
This is important for users who are using different views and may have split up events or conversions across views.
Conversions, however, do have a set limit. You can only have 30 conversions for your website. When it comes to setting up events, you can skip to Step #5.
Property Settings
There are a couple of items you’ll want to check in your UA account and then duplicate them in your GA4 account.
Filters
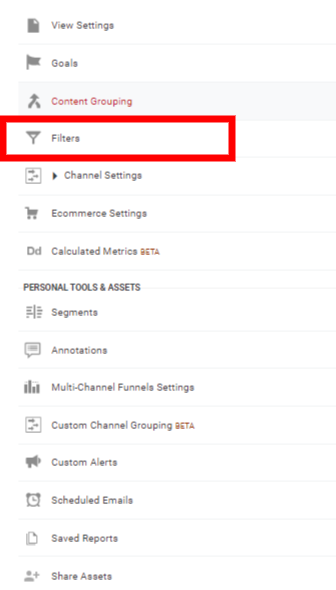
In your UA account, go to Admin and then click on filters in the right-hand column.
Here, you’ll want to mark down any filters you may have, such as excluding traffic from certain websites, internal IP filtering, and more.
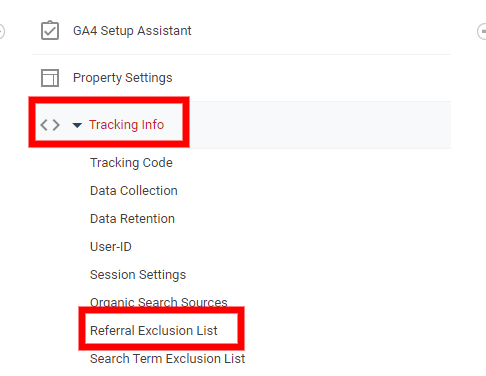
You’ll also want to collect any URLs on your Referral Exclusion List which can be found in the middle column under Tracking Info:
Let’s start by filtering out our internal traffic.
First, go to Data Streams, click on your Data Stream name, and then click on Configure Tag Settings.
Once inside, click on Show All on the right-hand side.
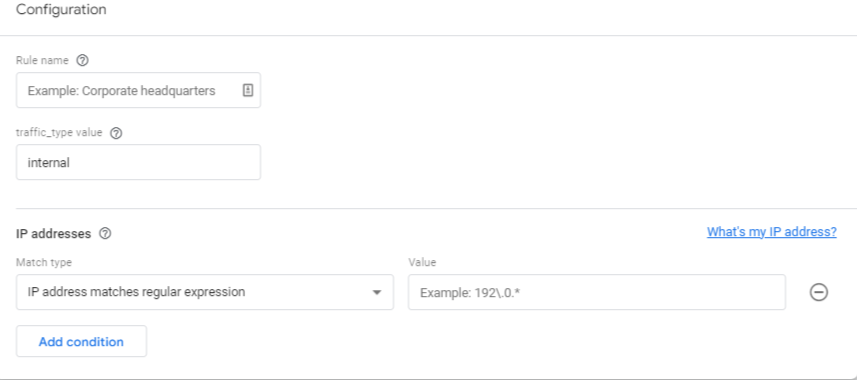
Halfway down the list, you’ll go to Define internal traffic. From here, you can enter the IP addresses you want to exclude.
However, this step won’t be complete until you’ve turned on the Internal Traffic filter.
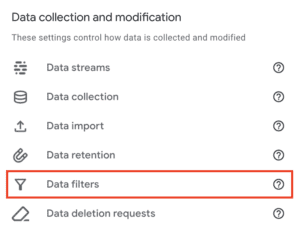
To do this in GA4, go to Admin, Data Collection and Modification, and then Data Filters.
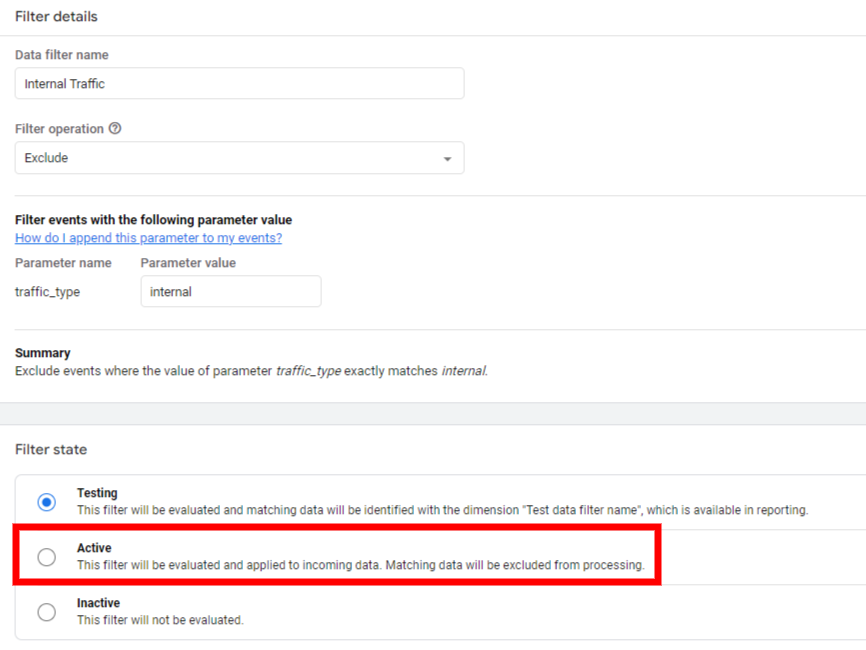
Internal traffic will already be an option for you to click on. Once inside, you can switch the Filter state from Testing to Active.
Step 3: Set Data Retention
Once you’ve finished with some basic UA items, you’ll need to make some changes to your GA4 account.
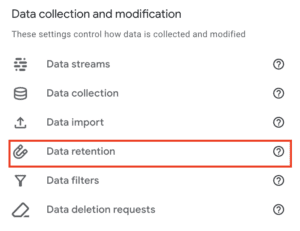
The first would be to change the Data Retention settings inside your GA4 profile. Go back to Data Collection and Modification→ Data Retention.
By default, the setting is set to two months. You want to change this to 14 months. This will ensure your event data is, you guessed it, retained for up to 14 months.
360 users have the option to set their data retention to even greater lengths.
Step 4: Connect Your Products To Google Analytics 4
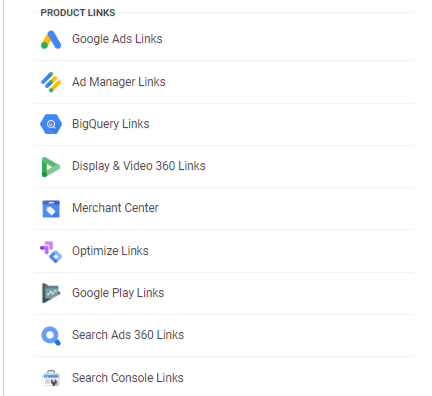
GA4 makes it easy to connect to a number of Google products. By going back into the Admin Menu and scrolling down, you will see a number of options.
From here, it’s as easy as clicking a button to get everything set up.
Obviously, you can decide what you want to connect here but if you have any of the available tools, it’s a smart idea to go ahead and connect them.
You do, however, have to have admin-level permissions on both tools to be able to establish a connection. So, if you’re trying to connect to Google Search Console for a client and you don’t have admin-level permissions on GSC, you will not be able to connect.
Step #5: Start (Re)Creating Events and Conversions
One of GA4’s biggest advantages is that you can track everything. With Universal Analytics, you were ultimately hindered by UA’s 20-event limit on views, forcing you to create multiple views if you had a plethora of events to track.
As Ultron once said, “I had strings but now I’m free, there are no strings on me.”
So, where do we get started?
Collect Your Events
In Step 1, I had a spreadsheet that can be used to track your event and conversion migration. It’s helpful to have a list and check them off one by one as they’re ported into GA4.
Once you have your entire list ready, you can start moving them over or recreating them.
Automatically Collected Events
Thanks to GA4’s Enhanced Measurement, there are a number of events that are automatically collected. Some of them are connected to apps, but for web users, the most important ones are:
- click
- file_download
- form_start
- form_submit
- page_view
- scroll
- session_start
- user_engagement
- video_complete
- video_progress
- video_start
- view_search_results
On top of this, there are some recommended event names that Google has kindly given. Now, you don’t have to follow these guidelines but it is helpful to play by Google’s rules here.
Let’s talk about creating some events.
Destination Events
Destination events are just like they sound: they will trigger when a user reaches a destination.
To create a destination event, go back into your admin space, click on Events, and then click on Create Event.
Once inside, hit Create. You’ll be taken to a new screen after this with the information you want to input.
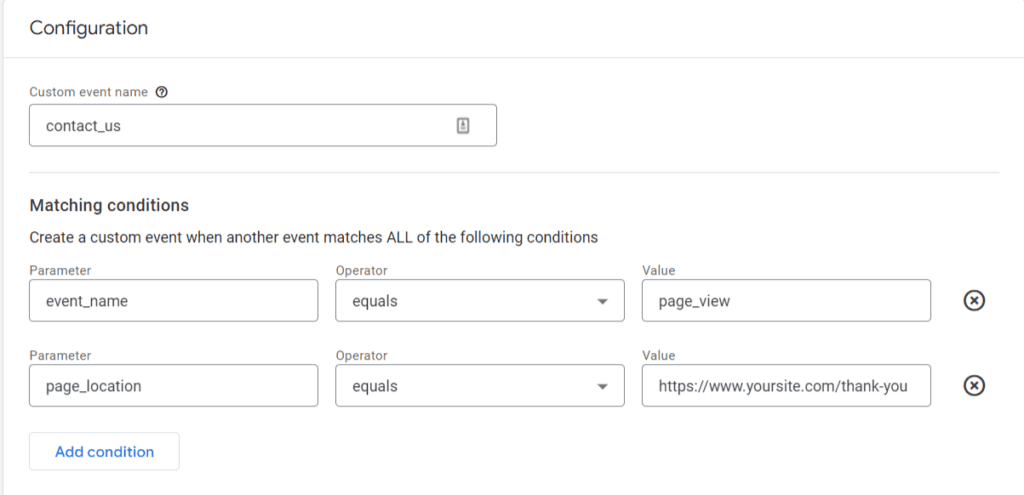
Let’s say you wanted to create an event named contact_us and it triggered when users reached the /thank-you page.
Here’s how that would look:
Remember, everything in GA4 is an event so you have to set the event_name to equal page_view here as you are trying to track a certain page view.
If you wanted to switch that event to a conversion, go back into the Admin menu and select Conversions which is conveniently located under Events.
Click on New Conversion Event and type in contact_us.
That’s it! You’re finished.
Event-Based Goals
If you have any UA goals that were event-based, such as clicking on a button, clicking on a link, opening a chat window, or something else entirely, you most likely set this up through Google Tag Manager.
The good news is that it’s incredibly easy to move these events and goals to GA4.
Go to your Google Tag Manager, find your container, and open it.
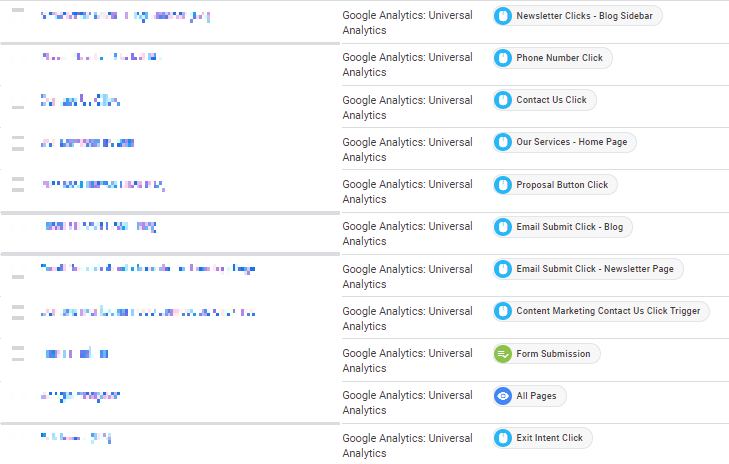
Look for any of the UA tags you have.
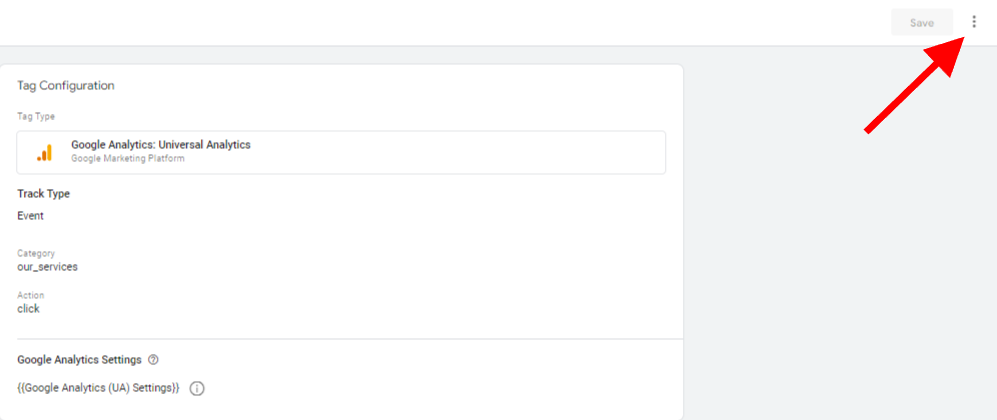
Click on the first tag name and in the top right corner, you’ll see three dots.
Click on those dots and press Copy. GTM will automatically create a new, identical copy of your UA tag.
Now, we need to switch it over to GA4.
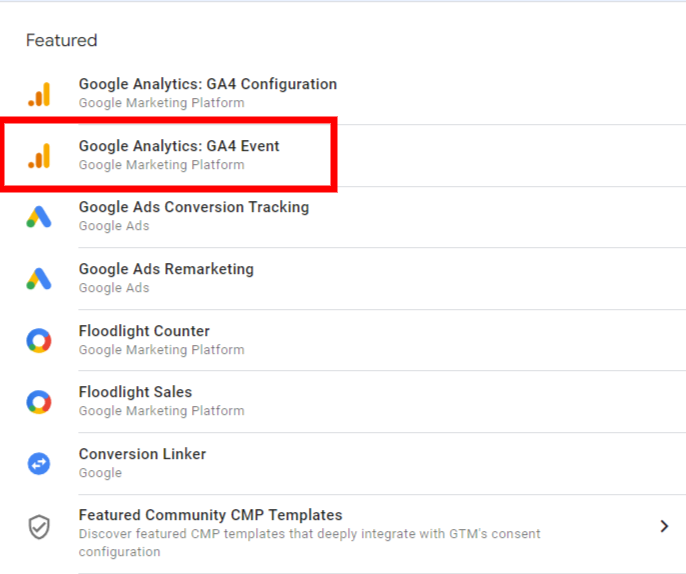
Click on the Google Analytics: Universal Analytics bar. That will open up a number of options, so select Google Analytics: GA4 Event.
Select your GA4 configuration tag if you have one. If not, you can manually enter your GA4 measurement ID by selecting New Tag. From here, you can enter your GA4 measurement ID once and use it for all your GA4 events.
If you added your Measurement ID through GTM in earlier steps, it will already be here.
I usually name it something simple like GA4 Tag.
Now, you can use this tag for all GA4 events you need to create.
Go back to your previous event and enter the name of this event. Once you have the name, you’re all set.
We don’t need to change the trigger unless you are making some big site changes. The trigger will work for both your UA and GA4 events, so leave it be!
What if They’re Conversions?
If you’re creating conversions in GTM, then proceed as if you were making an event. You’ll just need to make some quick GA4 changes ahead of time. Simply go to Admin, Conversions, and create a new conversion. Enter the name exactly how you have it in GTM. GA4 will see Contact Us, Contact_Us, Contact_us, contact_us, and cOnTaCT_uS as five different events, so make sure you copy it right over.
Testing Your Events
Measure twice and cut once. Or in this case, set up events once and test aplenty.
Now that you’ve set up your events, it’s time to make sure they actually work. Even if you didn’t change the trigger, you want to make sure your event will show up in GA4.
To do this, click the white Preview button in the top right-hand corner.
Once you land on your site, you will also have the Tag Assistant pop open.
Follow the steps to complete your event. Once you do, you will see the event fire in GTM’s Tag Assistant. Great!
Now, you need to make sure GA4 is collecting the event.
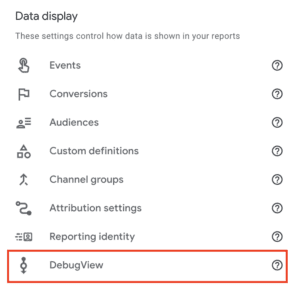
Go back to your GA4 property, go to Admin, then click on DebugView at the bottom of the Data Display menu.
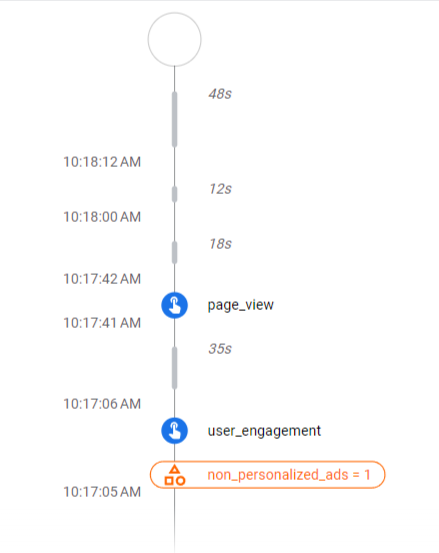
It may take a minute or two for the DebugView to load but events will start popping in.
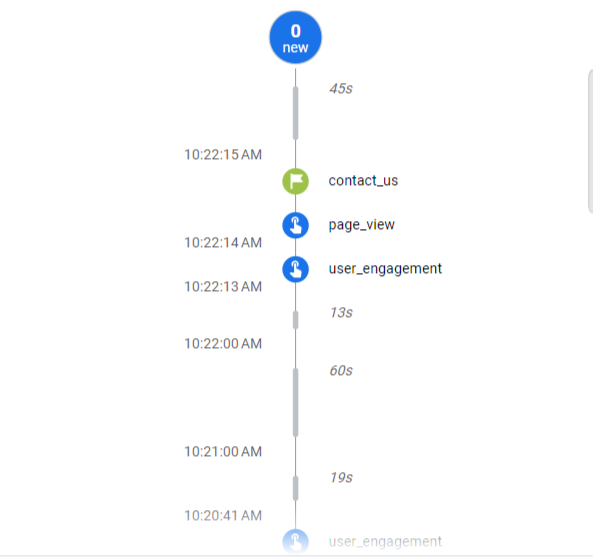
Once you go through the event steps, you’ll see your event pop up. If you changed it into a conversion, you will see your event accompanied by a green flag.
Once you see this, it will take about 24-48 hours before your GA4 property starts collecting event and conversion data.
Above all, don’t forget to publish your GTM container when it’s ready to go!
What About Categories, Actions, and Labels?
In case you didn’t notice, those have disappeared from GA4 events.
Let’s say you have a number of different forms on your website and you wanted to track each individual form. You will now have to use unique parameters in GTM and Custom Dimensions in GA4.
You can set up individual triggers for those each event and create separate names. Or, you could create one basic event and have unique parameters for each submission.
How can we do this?
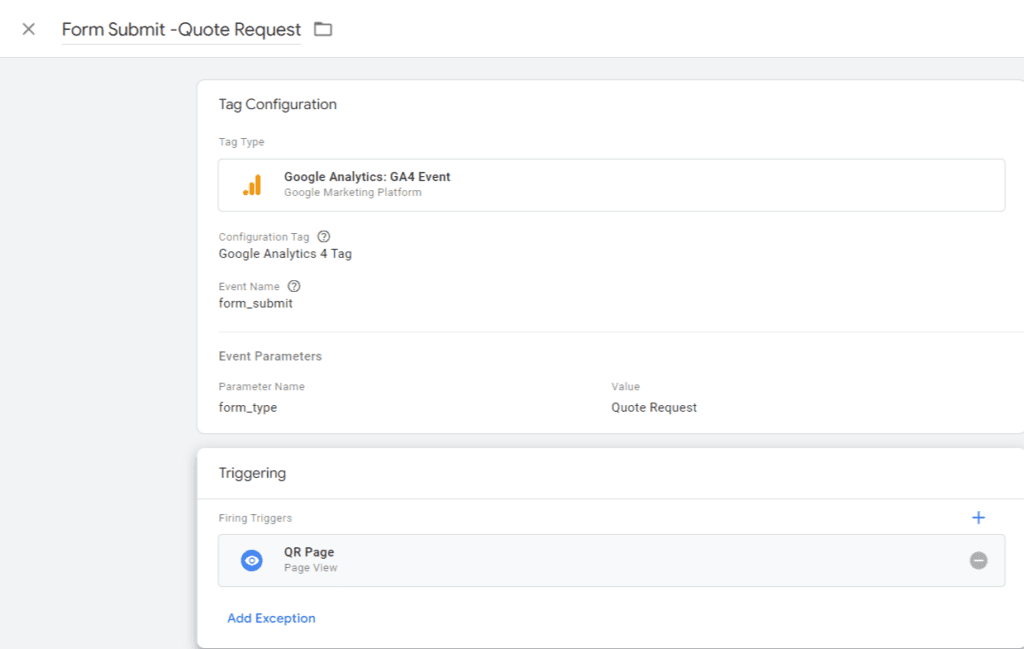
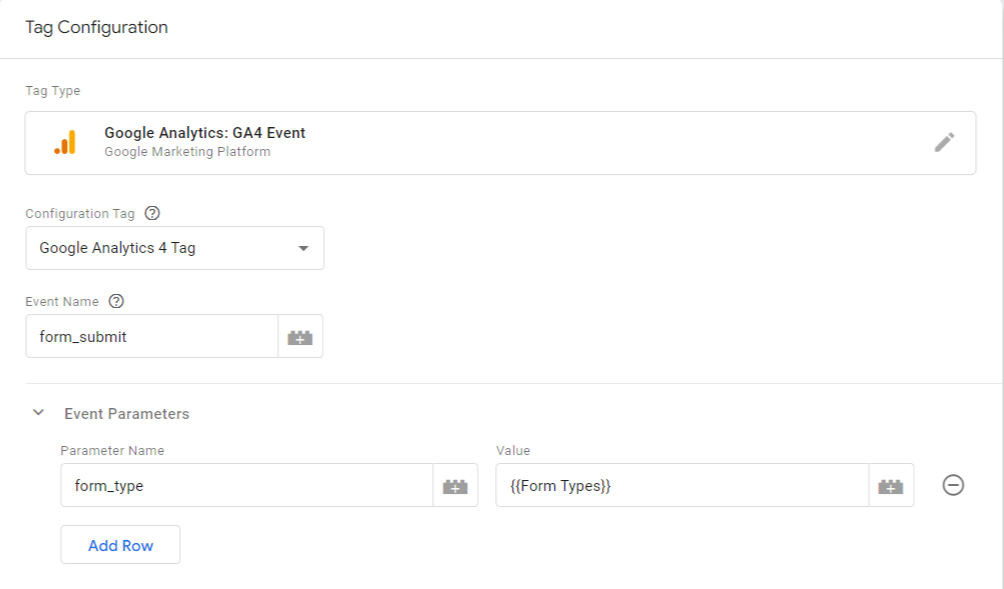
Start by creating a new GA4 event. I named mine form_submit.
Under the Event Name, I added Event Parameters and created a Parameter Name form_type,
For the trigger, you could create an individual trigger for each form submit.
You could do this for every single form submission which is fine if you only have two or three. But what if you have over 20? By making an event and subsequent conversion for all 20+ forms, you’re going to be hitting the conversion ceiling pretty quickly.
Instead, you could create a lookup table.
To do this, go to variables on the left-hand side.
Scroll down to the bottom and hit New.
Name your variable something easy to remember, like Form Submit Types. Hit configure in the middle.
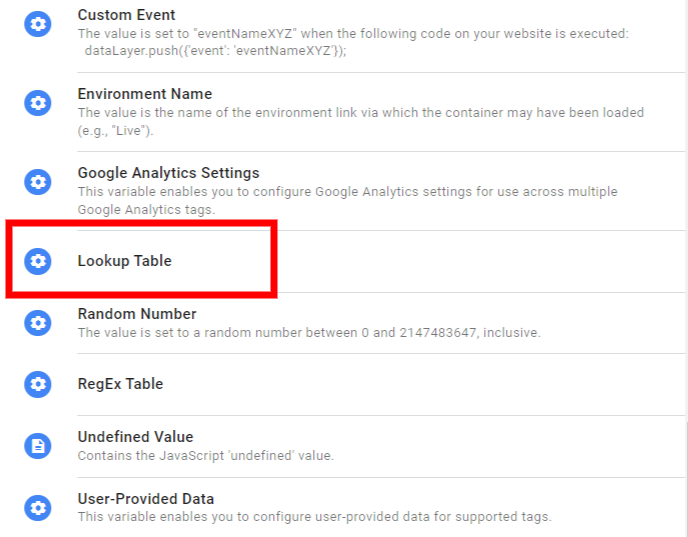
That will bring you to a long list on the right-hand side. Scroll down to where it says Lookup Table.
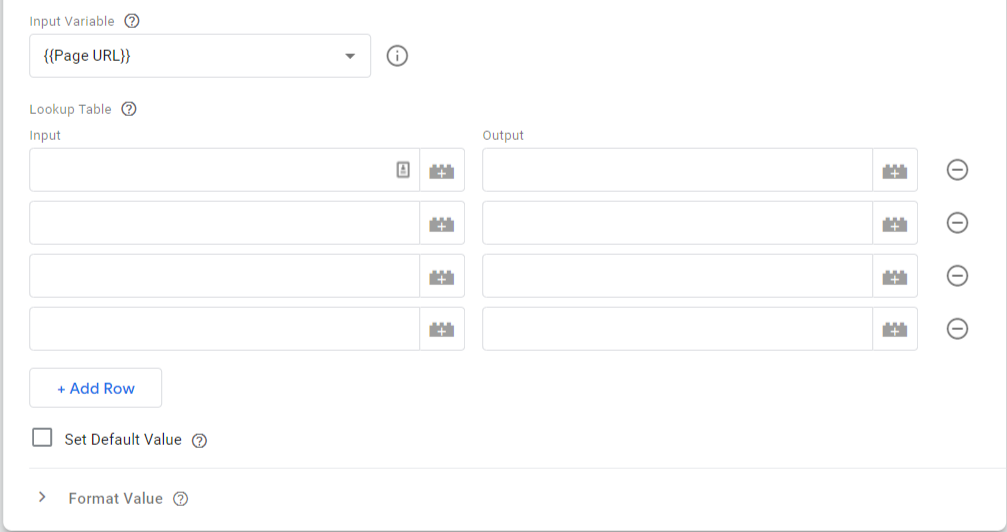
From here, you will have to choose an input value. Let’s say all your different forms had unique Page URLs. Select {{Page URL}} from the dropdown list.
Then click on +Add Row. Add as many rows as you need.
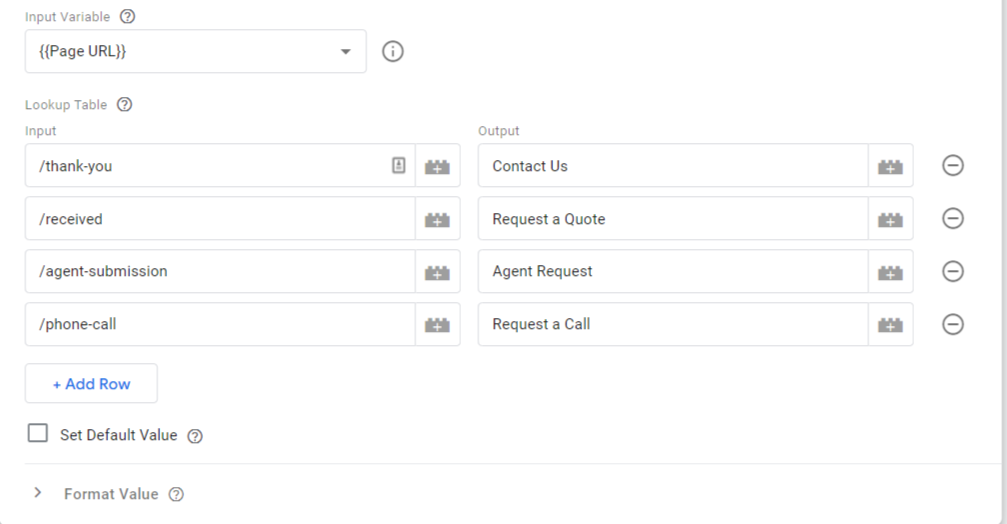
In the left-hand column, enter the input, i.e. the Page URL where the form lives. In the right-hand column, enter the output. It could be something like this.
Once you’ve saved this, you need to go back to your event and add this as the Value for your previous parameter. Instead of typing in an individual value as we did earlier with Quote Request, we’re going to add the variable here.
Now, whenever your trigger fires, GTM will pull the correct form and fill it in for form_type. Pretty neat, right?
But wait, there’s more!
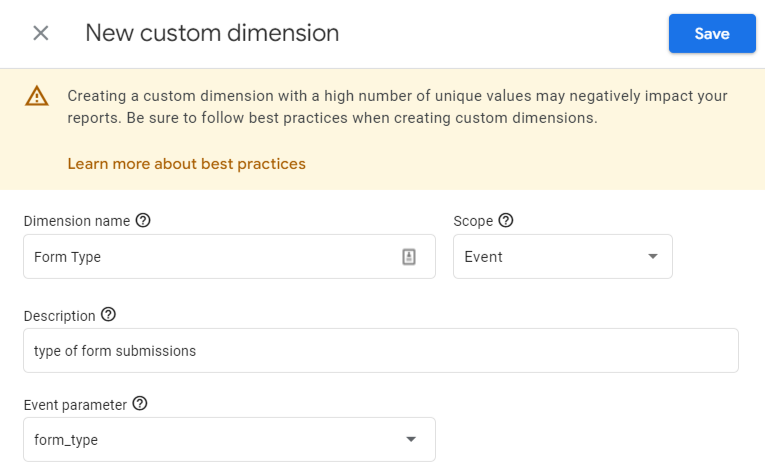
In order for GA4 to understand this parameter, you need to use the other item we talked about earlier: Custom Dimensions.
To create one, go back into your GA4 property and choose Custom Definitions in the admin menu.
From here, click on Create custom dimensions.
Just like with conversions, you’re going to need to enter the name exactly how it is in GTM.
So if you used form_type, you should enter that in the Event parameter.
Now, when you collect form_submit events, you’ll also be able to see the type of form that was submitted.
Final Words
Setting up Google Analytics 4 can seem like a gargantuan task, but it doesn’t have to be. By creating an organized chart with your events and conversions, you can quickly migrate your past items into your new property.
GA4 has its ups and downs but provides plenty of benefits as we move into a new method of collecting web data and information.
Search News Straight To Your Inbox
*Required
Join thousands of marketers to get the best search news in under 5 minutes. Get resources, tips and more with The Splash newsletter:

