If you are one of the many advertisers using Google’s platform to reach customers, then you’ve probably heard about Performance Max campaigns. Performance Max campaigns use automation to manage ads but also allow advertisers some flexibility in choosing asset groups, which are then used to show the most promising ads to target audiences. According to Google, an asset group is a collection of assets centered on a theme or related to a target audience. The asset group is used to assemble all of your ads and build an inventory for all applicable ad formats for your advertising objective
When we create a Performance Max campaign, Listing Groups are the most important asset. In this article, we will discuss asset groups and listing groups to clarify any confusion and to provide information on how to optimize product listing groups so that you can efficiently manage your campaigns.
Related Articles:
Asset Groups Vs Listing Groups
If you don’t have a lot of experience creating, managing, and optimizing Google Ads campaigns, you may be wondering what those groups are and what the difference is between them. It can get a bit overwhelming learning all the terminology, but we will take it step-by-step for you.
First, we’ll discuss asset groups and then get into defining listing groups since they are closely interconnected.
According to Google, an asset group is a set of creatives that will be used to create an ad depending on the channel it’s being served on. Those creatives are provided by the user and then Google uses a combination of these to automatically create ads to achieve the selected campaign goals. You’ll need to create at least one asset group, but additional ones can always be added to the campaigns.
Listing groups are another way of saying a list of products and collections submitted through product feeds to Google Merchant Center which in turn is pulled by Google Ads to be used for the Performance Max campaign. Listing groups allow advertisers to select which products to advertise and which ones to exclude.
This function enables individuals to choose listings that are the highest priority to be shown to potential customers. There are many ways to group product listings within Listing Groups and we will discuss some of the most commonly used grouping techniques, such as product categories. product type, custom labels, as well as brand grouping.
How To Create A Product Listing Group
As previously discussed, product listing groups are part of your asset groups. During the process of campaign creation, there is an option to choose a single feed from Google Merchant Center to be used for the campaign, or “Use all available feeds” can be selected.
If multiple feeds are providing product details to Google Merchant Center and the goal is to advertise every product then selecting all available feeds is preferred. However, if only certain feeds are important for the campaign, then those campaigns can be selected individually from the list that appears in the “Feed label” box.
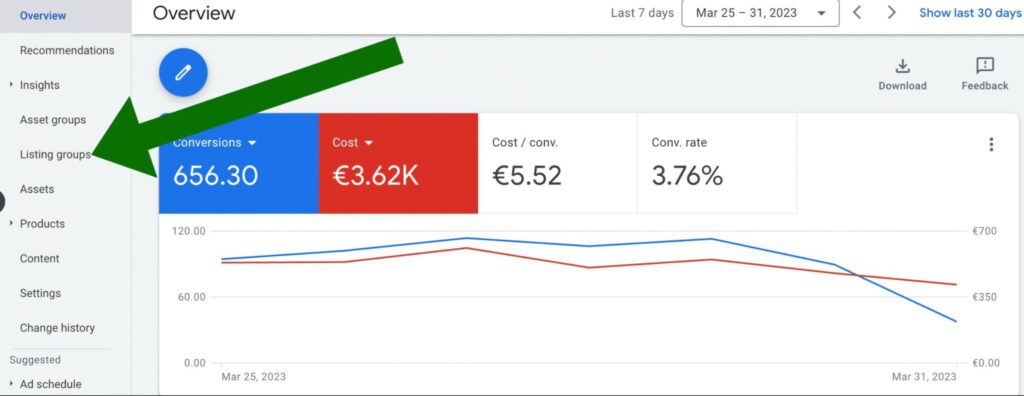
Listing groups are also accessible from the overview of the campaign. As you can see in the screenshot above, the link is located below the asset groups link for the existing campaigns. Also, settings can be accessed from the same page to make any necessary changes to the structure of the campaign, such as feeds and products to use.
Now that the proper feed is selected and targeted products are chosen, the grouping of products by attributes such as categories, product type, custom labels, and brand is possible to further customize or narrow down the listing groups for a particular campaign.
Grouping By Product Categories
Product categories are a useful way to group products if the purpose of the campaign is to focus on a particular subset of items. It is also practical for businesses that sell within multiple categories.
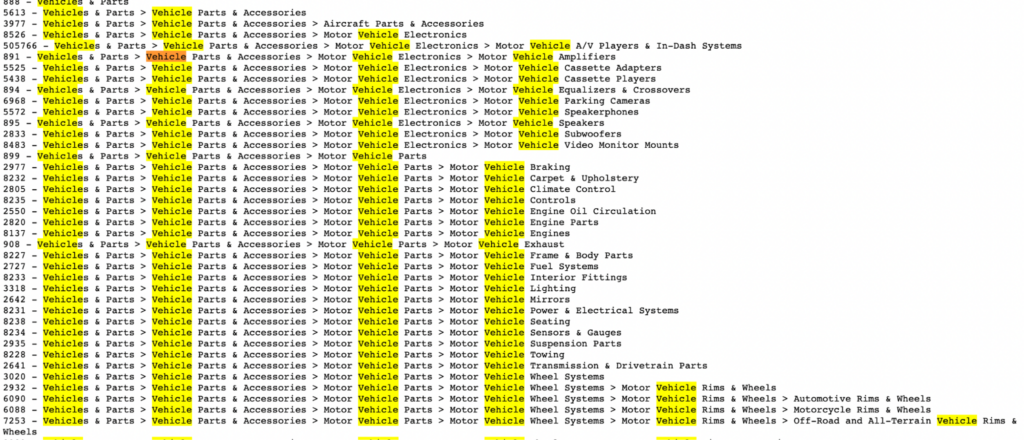
For example, an online store that sells car parts may have products listed within different categories: tires, brake pads, headlamps, etc.
Here you can see some of the categories that are available within Google’s category taxonomy.
A single campaign can potentially focus on one of the categories, while other campaigns focus on other ones. The benefit of such groupings is the ease of managing each category and the freedom it provides to include or exclude certain categories of products. Another benefit of running separate campaigns per category is the ability to set appropriate budgets based on category.
To group products by product category, follow the steps below:
- Go to Campaign Overview
- Click on Listing groups
- If no groupings have been done, you will see All Products.
- To the right of All Products, hover your mouse and you will see a plus sign, click on it
- A new window will open up with options
- The top of the page will have a drop-down Menu next to Subdivide: All products by:
- Select Category to see eligible categories for grouping
- From the list, select a category for the campaign and click Save
In our case, we selected Apparel & Accessories and the following is the result of our grouping:
While grouping by product categories is great, other attributes can also be used to group products to optimize listing groups.
Grouping Products By Product Type
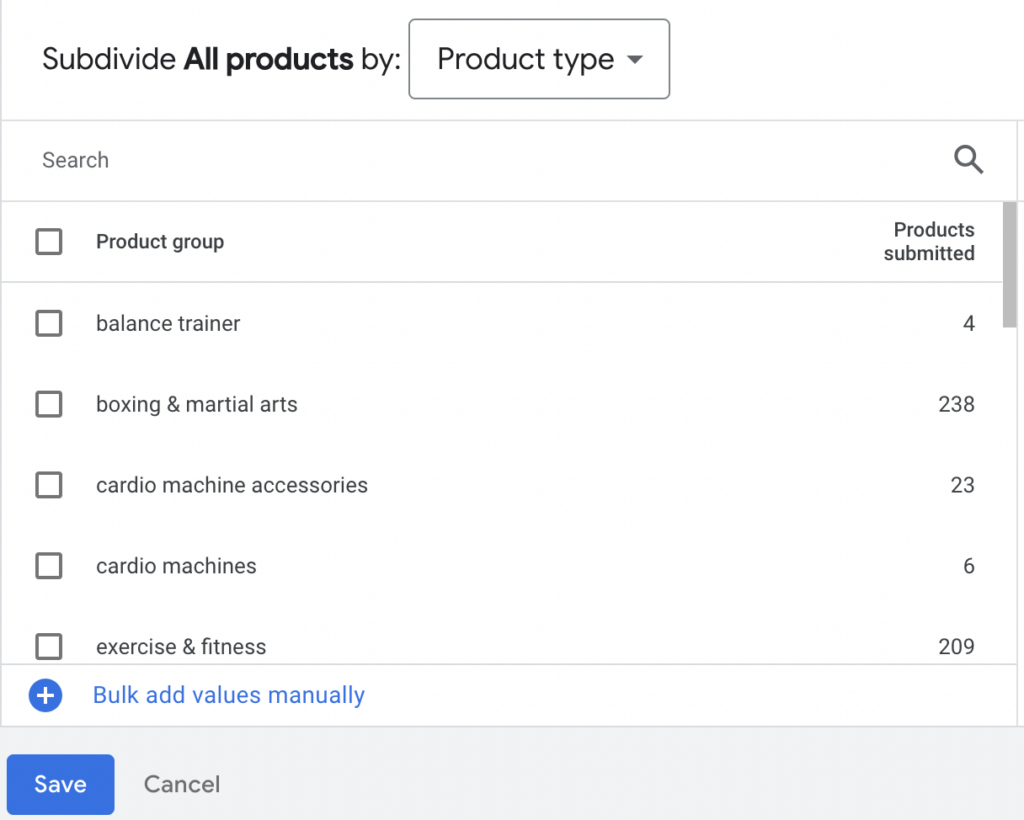
Similar to grouping products by categories, product type grouping can be used to organize and optimize listing groups. Product type is an attribute submitted to Google Merchant Center by the user. It is an attribute used to provide self-categorization to products and is primarily used for sorting and managing listings that the business owner thinks belong together. When Google product categories do not reflect how we would like to categorize our products, we can easily use the “product type” attribute to solve the issue.
While it is a great option for grouping product listings, one caveat is that if the attribute is not being used already, it can take a considerable amount of time to submit product types for each product. Depending on the number of products currently active within your Google Merchant Center account, sometimes it makes sense to go with other available options.
Also, if your store is being hosted by an eCommerce CMS, such as Shopify, it is possible to update product type attributes in bulk. Once the product type is submitted per product, the subdivision should show all the available types and the number of products within each product type.
Grouping Products By Custom Labels
“Custom labels” is another customizable attribute similar to the “product type” that is available within Google Merchant Center and is solely used for organizing and optimization of product listing groups. As the name suggests, custom labels are created by the person responsible for product feeds and can be anything, including numbers and letters. Keeping simple naming conventions for custom labels is preferable when using custom labels.
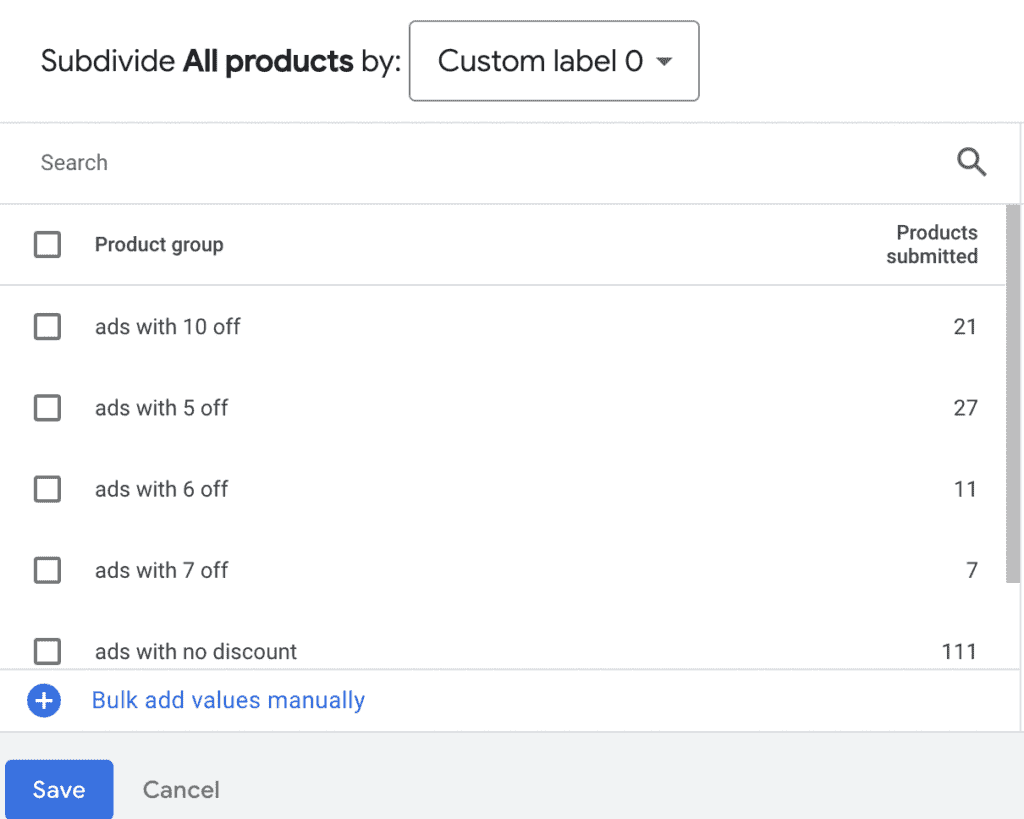
Up to five custom labels can be submitted, starting from “Custom Label 0” all the way to “Custom Label 4.” Once again, it is an attribute that lets users self-categorize and is not visible to customers nor is it used by Google for public categorization of products.
The above screenshot shows an account that is using “Custom label 0” to separate products based on the coupon codes that give the customer a percentage off the retail price. Once a custom label is selected, the labels that are available along with the number of products under each label will be shown. Select the ones that should be served by Google for the campaign. Click “Save” and you are done with grouping products by custom labels.
Grouping Products By Brand
“Brand” is an attribute that is required by Google Merchant Center for any product that is submitted to their database. Grouping products by brand may be a good idea when the purpose of the campaign is to serve products of a specific brand.
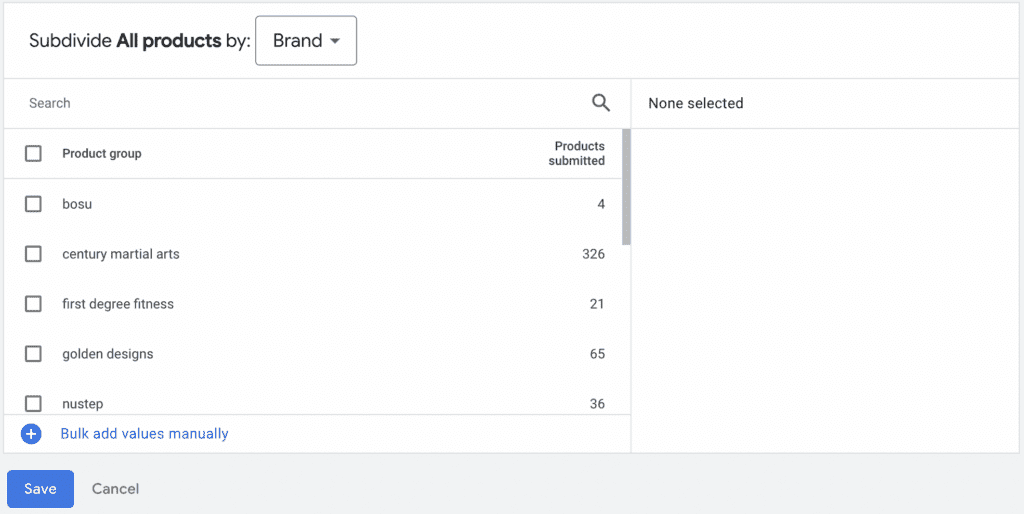
Setting this up is very similar to setting up other listing groups. Select Brand from the drop-down menu to populate all the brands available within the product feed:
How To Filter Listing Groups
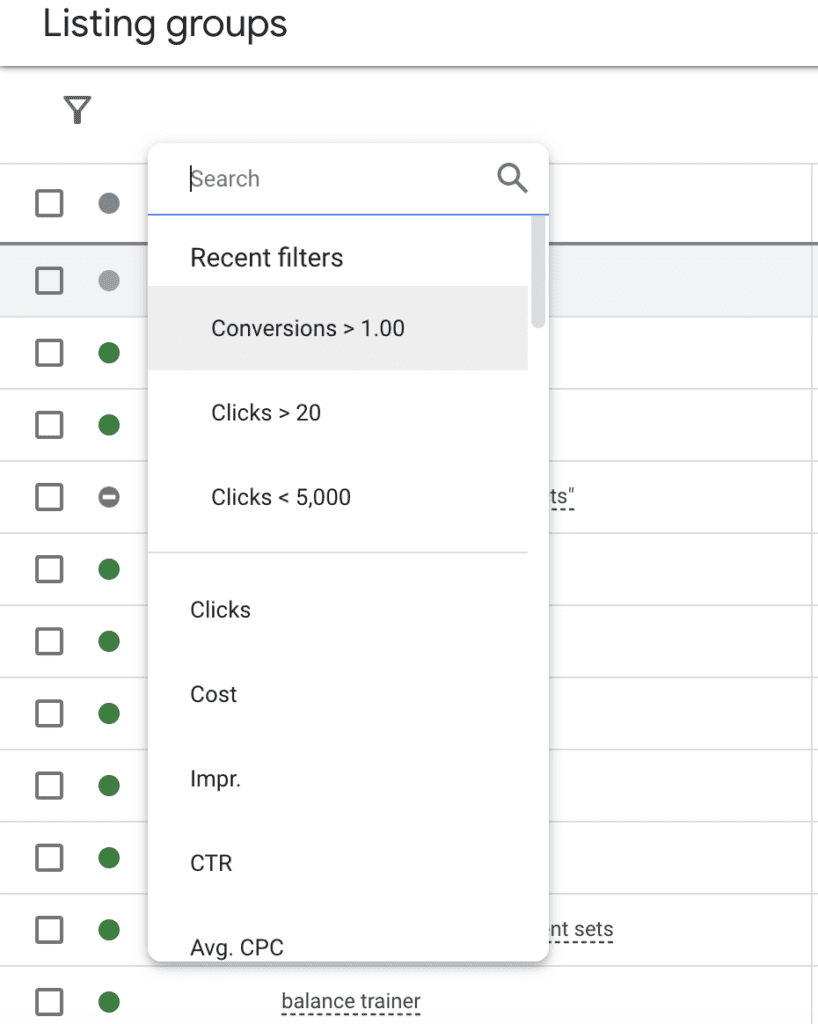
Filters are used to view listing groups that fall within a certain criteria of what you are looking for. It is an extremely useful feature that allows you to view products based on numerous data points you would like to see. For example, it is possible to view listing groups that have the most clicks, conversions, impressions, or even based on average Cost per Click (CPC).
To add a filter, simply go to the Overview of the campaign and click on “Listing groups.” Let’s say listing groups are grouped by the “Product type” and the list is long. To see which product type has an average CPC of less than $0.3, see the screenshot below:
Once a filter with appropriate conditions has been created, it can be saved for future access. This feature is great for accounts that have many products, categories, product types, etc. It allows you to filter and see which listing groups are doing well and the ones that are not doing as well based on the conditions that the user specifies.
Conclusion
To run a successful Performance Max campaign, I highly recommend spending a bit more time managing each section of the campaign to ensure everything is optimized and set up properly. Advertisers and Google’s AI can drive highly successful Performance Max campaigns through effective campaign control. By strategically grouping product listings based on goals, campaigns can achieve greater success and profitability. Utilizing filters and proper grouping ensures optimal focus on top performers, avoiding the wastage of time, money, and energy spent on less promising products.
Good luck and happy tuning!
Search News Straight To Your Inbox
*Required
Join thousands of marketers to get the best search news in under 5 minutes. Get resources, tips and more with The Splash newsletter:
