Table of Contents
With almost five million eCommerce sites around the world, Shopify is a powerful and robust eCommerce CMS that has witnessed incredible growth over the last decade.
Despite such rapid growth and a strong foothold in the world wide web, Shopify was slow to roll out Google Analytics 4 integration, certainly making your web analytics goals a little tougher to track.
The Shopify-GA4 connector finally debuted in May 2023, less than two months before UA’s sunset.
Below, we’re going to walk through how to get your connector set up and what additional steps you can take to ensure your Shopify site is ready to go.
Related Articles:
What does the GA4 Channel App Do?
The GA4 Channel App makes it easy to connect your Shopify site to your GA4 account. It will send all the ‘basic’ GA4 metrics to your GA4 account for data collection, such as sessions, page views, user counts, etc.
It will integrate with some additional GA4 eCommerce events such as:
- view_item
- add_to_cart
- begin_checkout
- add_payment_info
- purchase
It will also collect additional parameters about the events, such as:
- ecomm_pagetype
- ecomm_prodid
- ecomm_totalvalue
These parameters will be added to those eCommerce events listed above.
Step 1-Remove Existing Tracking Codes from Shopify Settings
This first step is an ‘it depends’. Before the Shopify connector was released, there were a few workarounds to get Shopify eCommerce events and conversions to start working on your site.
If you installed such a code, you’re going to need to remove that code so you avoid double-counting across the site. If someone were to make a purchase, the purchase event would fire twice on the site, and revenue would be misrepresented.
If you don’t feel comfortable doing this, you can ask your developer to remove and test the code.
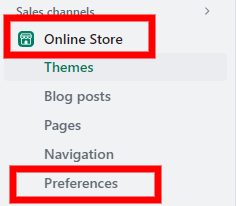
First, go to your Shopify dashboard and click on ‘Online Store’.
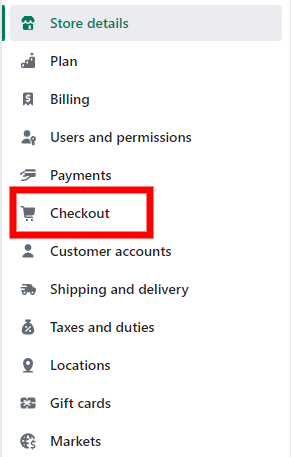
If you haven’t implemented the GA4 connector, you can check the existing code by going into your Shopify Admin area and going to ‘Settings’ in the bottom left corner.
Then on the left-hand side, click on Checkout.
Scroll down to the bottom and see if there is any code in the Additional Snippets area. You will want to check for any code being sent to your current GA4 account. There might be some additional code in there for other applications like HotJar or Microsoft Clarity. If you’re not sure what to delete, check with a developer.
If it’s blank, then you’re good to go, and you don’t have to worry about anything.
If not, then you’ll want to remove this code. I recommend copying and pasting it to a place where you can easily access it again, like Visual Studio or even a simple notepad.
Removing Code From Shopify Theme
You’ll also want to make sure and remove the existing tag from the Shopify theme. A developer will have to do this part, but the code they’re looking for should look like this:
<!-- Google tag (gtag.js) --> <script async src="https://www.googletagmanager.com/gtag/js?id=G-XXXXXXXXX"></script> <script> window.dataLayer = window.dataLayer || []; function gtag(){dataLayer.push(arguments);} gtag('js', new Date()); gtag('config', 'G-XXXXXXXXXX'); </script>
The new Channel app will manually insert the tracking code here so you don’t need to keep this.
Step 2-Setup the Google Channel App
Now that we’ve cleaned up your Shopify dashboard, it’s time to set up the Google Channel App.
Go back to your dashboard, click on Online Store, and then click on Preferences.
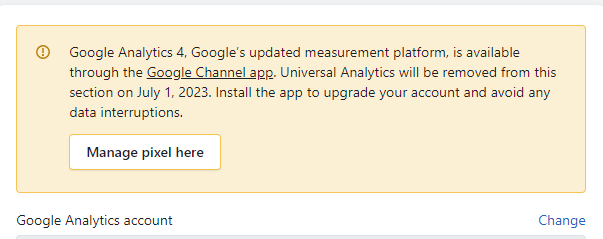
Once inside, you’ll see a yellow box in the Google Analytics section.
Click on Google Channel app (of course).
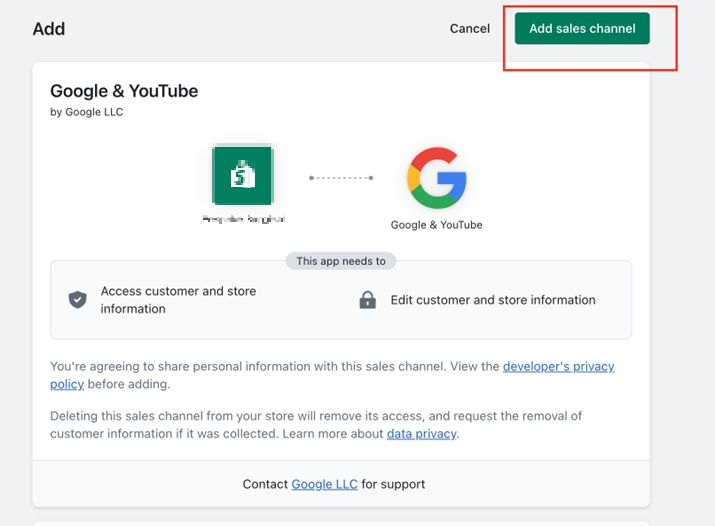
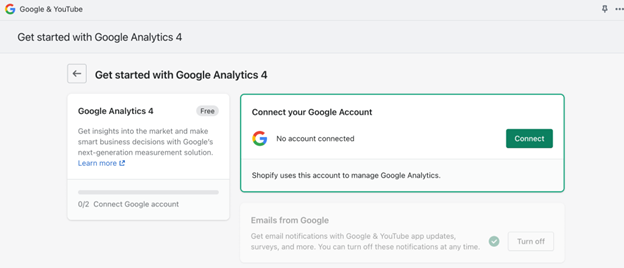
From here, you’ll be taken to a setup screen where you’ll see a big green button to ‘Add Sales Channel’.
After clicking here, you’ll be taken to another screen to connect your account.
Go ahead and click on “Connect” to get set up.
Then, you’ll be asked to choose the right Google Account to connect Shopify and your website. Choose whichever email has the highest level of access to your GA4 account.
You’ll then have to choose your GA4 property. If you’re managing one site, then that should be a breeze (unless you are very lost).
Once you’ve connected, you’re finished here!
Step 3-Test to Make Sure It’s Tracking
With everything connected and settings saved, it’s time to test and make sure it’s working.
Google Tag Manager
To do this, head to your Google Tag Manager (if you have one installed) and enter the Preview Mode.
Here, you’re going to double-check and ensure that nothing is double-counting. If you see events double counting, you’re going to want to go back and find that extra tracking code. You can ask a developer for help.
Then, you’ll want to navigate to your shopping area and click on an item.
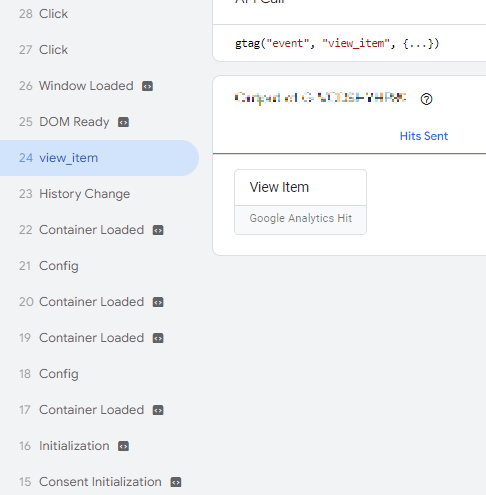
Once you do, you should see view_item pop up in your GTM preview mode.
Great! It’s only popping up once and not double-counting.
If you have a test account to use, you can go through the entire purchase funnel.
While we’re at it, let’s test and make sure events are popping up in our GA4 DebugView.
GA4 Debugview
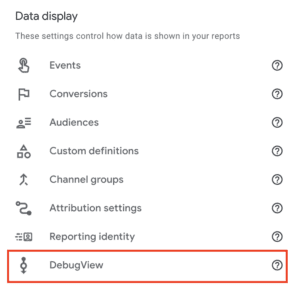
Head to your GA4 account, click on the Admin icon at the bottom left, then click on DebugView.
If you’ve already completed the events, then items should have already begun populating inside the DebugView.
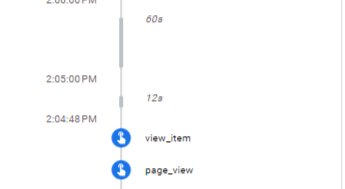
Here, we can see that our view_item event popped up right after we viewed our item, excellent!
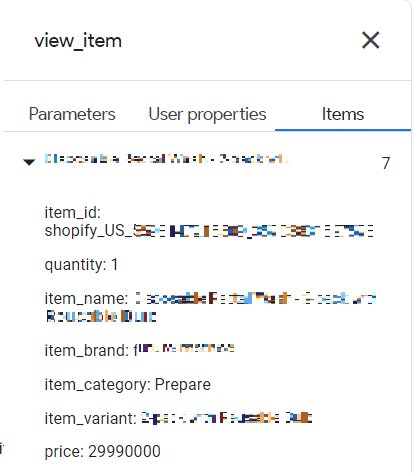
We can also see the parameters previously listed populate the parameters tab.
Analytics Debugger
If you don’t have Google Tag Manager installed on your site, you can use a third-party tool called the Analytics Debugger.
You can use this tool to actively debug your site and ensure everything is loading properly. I can vouch for this tool, as it’s incredibly useful.
Once you add the plugin to your browser, use the Inspect tool by pressing CTRL+SHIFT+I on Windows or CMD+SHIFT+I on Macs.
At the top of the window, you will either see the Analytics Debugger available or have to use the two right-facing arrows to select the plugin. Click on the tool and then hit the Start Debugging button under the fashionable duck.
Once you click debug, it will refresh the page and you’ll see events pop up.
Success! We can see our view_item event pop up. You can go through the same steps in the purchase funnel if you want to see all steps populate, but it looks like we are ready to go.
Step 4-Wait 24-48 Hours
GA4 tends to be on the tortoise side of things when it comes to reporting, so wait 24-48 hours before you check and see if additional information has been collected.
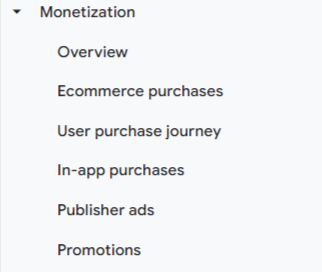
After you’ve done so, head back into your GA4 account and go to the Monetization report.
From there, you’ll see a list of reports to zero in on.
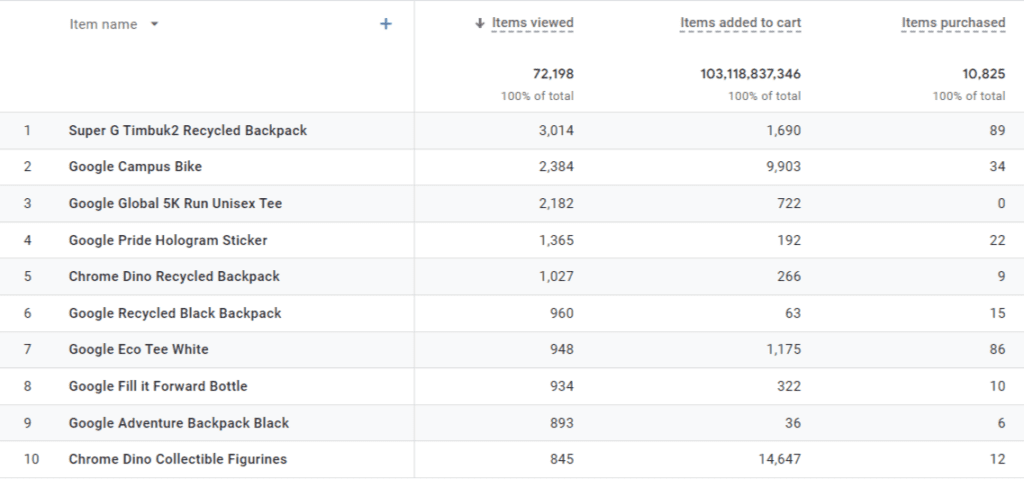
If you’re looking for simple eCommerce reporting, Overview and Ecommerce purchases will be your go-to.
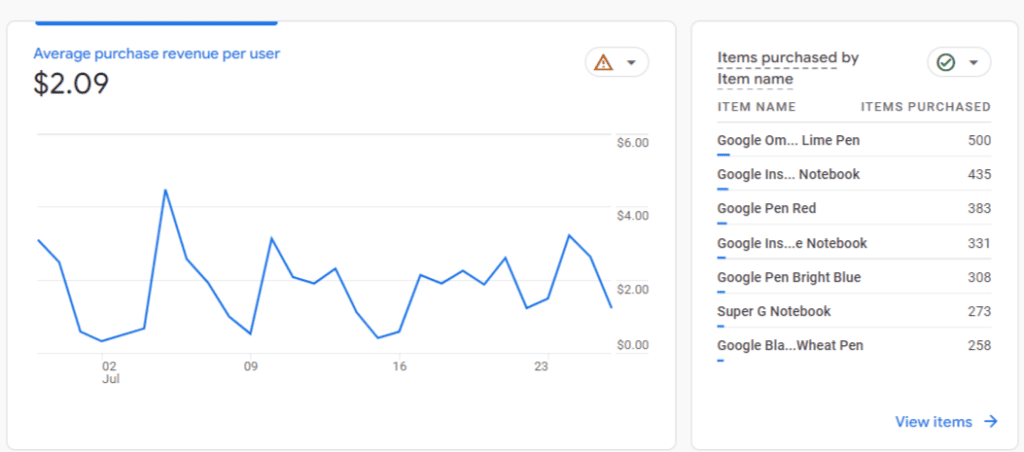
Overview is just what it sounds like, a general overview of your eCommerce performance. You’ll be able to see total revenue, purchases, top items, and more by scrolling through this page.
The purchases section is where you can dive in a bit deeper and see a more detailed view of your items.
Downsides of the GA4 Connector App
While this app certainly makes things easy for implementation and configuration.
It lacks some events that would be handy to track for any eCommerce website. Some of these key events are:
- refund
- remove_from_cart
- view_cart
- view_promotion
- add_to_wishlist
It would be handy to have these, but unfortunately, the Connector App doesn’t include them. This could change at a future date, but right now, we’re stuck with what they’re giving us.
If you want to add these events, that could mean looking for an additional third-party app or doing some custom configuration on your own. For those that go that route, it would be great to loop in a developer.
Conclusion
The Google Analytics 4 connector app is an easy setup for anyone looking to connect their Shopify site with their GA4 account. It has some shortcomings, but it is a great first step if you’re looking to dive into the data behind user activity and eCommerce purchases.
Search News Straight To Your Inbox
*Required
Join thousands of marketers to get the best search news in under 5 minutes. Get resources, tips and more with The Splash newsletter:

