Table of Contents
Google Analytics 4 has the ability to track the terms users are searching for within your website. However, this feature is a bit hidden. Follow these 4 steps to uncover the keywords users search for on your website.
Step 1: Enable Enhanced Measurement
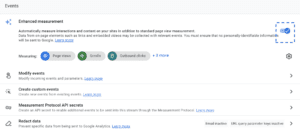
The first step is to make sure you have enhanced measurement turned on. This setting will likely already be on; however, you can check this by going to Admin > Data collection and modification > Data streams > Click on the data stream for your website.
You should then see a window called Web stream details. There, you can confirm that the enhanced measurement field is on.
Step 2: Turn on Site Search and Add Search Term Parameters
While you are in the Enhanced measurement panel, click on the gear icon.
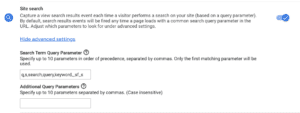
A pop-up window labeled Enhanced measurement will appear, and you will see a section called Site search. Ensure Site search is enabled and then click on Show advanced settings.
You will see a section called Search Term Query Parameter. Filling out this field will allow you to identify when a site search has occurred. GA4 already includes the default parameters of q, s, search, query, and keyword in this field. However, you will want to add the specific parameter that comes before a search term in your site’s URL.
To find out what this letter or sequence of letters is, go to the search box within your site and enter a word. Next, check the URL at the top of the page to see what comes before the word you searched. For example, the sequence of _sf_s appears before a search term on this particular webpage.
So, I added _sf_s to the Search Term Query Parameter box. If one of the 5 default parameters appears before a search term on your site, there is no need to add that parameter again.
Remember to hit Save after you make any updates to the Site search section!
Step 3: Create a Custom Dimension
Like you often do with other event parameters you create, the next step is to register an event parameter for site search as a custom dimension. Adding a site search parameter as a custom dimension is essential if you want to see specific search terms show up in your reports.
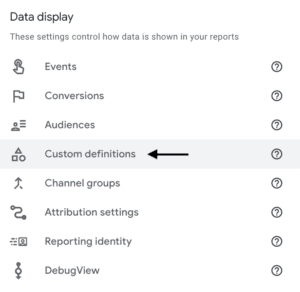
To create this custom dimension, go to Admin > Custom definitions > Create custom dimension.
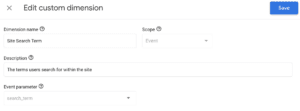
In the custom dimension box, fill out the dimension name, set the scope to Event, add a description, and label the event parameter as search_term.
You can choose any dimension name and description you want, but I recommend using names that clearly relate to the topic of site search. Make sure to hit Save when you finish filling out all the fields.
This custom dimension search_term is a recommended dimension according to GA4’s guidelines.
Step 4 (Optional but Helpful): Create an Exploration for Search Terms
After ~24 hours, your site search term data should populate in GA4. An easy and effective way to view this data is to create a search term exploration. To do this, go to the Explore section of GA4. Then, click on the blank exploration template.
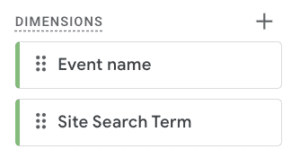
Under the variables tab, click the ‘+’ button next to Dimensions. Next, import the Event Name and the Site Search Term dimension you created in Step 3 by checking the box next to these dimensions and clicking Import. Your dimensions should now appear in the Variables tab.
Now, you will repeat those same steps, but this time for metrics. Go to the Metrics section of the Variables panel and click on the ‘+.’ Check the Event count metric in the pop-up window that appears, and then click Import.
At this point, you should have all the necessary dimensions and metrics to build your exploration.
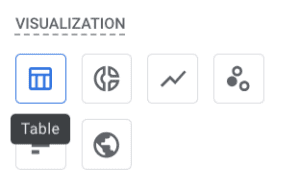
Navigate to the Settings panel in your exploration dashboard and set your visualization type to Table.
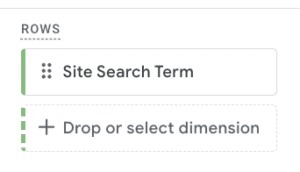
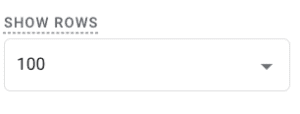
Next, go to the Rows section and drag and drop the Site Search Term dimension into that section. I recommend changing the Show Rows value from the default 10 to a higher number like 100. That way, you can see more of your search term data grouped together.
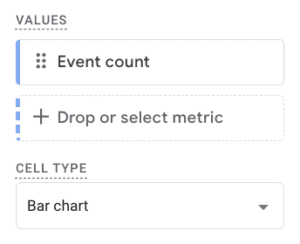
Now, go to the Values section in the Settings panel. Drag and drop the Event count metric you added in the Variables panel. To add some visual interest to your exploration, you can change the Cell Type to Bar chart.
After making these changes, you might notice a (not set) value appearing as your top result. To get rid of this value, you can set a filter. At the bottom of the Settings panel, click on the ‘+’ button below Filters and then click Event name. Under conditions, select exactly matches and then type in the event name of view_search_results. Make sure to click Apply after you complete all the filter fields.
The (not set) item should now be gone from your list, and you should see a finalized exploration for your site search terms.
Conclusion
Analyzing your site’s internal search term data allows you to understand better your audience and the topics users are interested in learning more about on your site. You can use this information to identify new content to add to your site that aligns with user’s popular searches.
Search News Straight To Your Inbox
*Required
Join thousands of marketers to get the best search news in under 5 minutes. Get resources, tips and more with The Splash newsletter:


